

Introduction

Building a website is no longer the exclusive domain of programmers. Enter Webflow: a powerful platform that empowers anyone, regardless of technical background, to design, develop, and launch stunning websites. Whether you’re a passionate entrepreneur, a creative freelancer, or simply looking for an online presence, Webflow offers a user-friendly interface and robust features to bring your vision to life.
This comprehensive guide will walk you through the basics of getting started with Webflow in 2024. We’ll explore the platform’s functionalities, delve into its interface, and equip you with the knowledge and confidence to build your first website
What is Webflow?
Webflow is a web design tool, a content management system (CMS), and a hosting platform all rolled into one. It empowers designers to build responsive websites visually, without having to write code, while also giving developers the freedom to fine-tune and extend the functionality as needed. Webflow bridges the gap between design and development, making it possible to create professional-grade websites with precision and ease.
Why Choose Webflow?
Before we dive in, let’s explore the advantages that make Webflow a compelling choice for beginners:
- No Coding Required: Webflow’s intuitive visual interface allows you to create websites using drag-and-drop functionality. No programming knowledge is necessary!
- Future-Proof Design: Webflow generates clean, semantic code for your website, ensuring it adapts to future technologies and search engine updates.
- Flexibility & Scalability: Webflow offers a wide range of design elements and functionalities. Your website can effortlessly grow and adapt alongside your business needs.
- Fast Loading Speeds & Security: Webflow prioritizes performance and security, providing visitors with a secure and lightning-fast browsing experience.
- Content Management System (CMS): Webflow integrates a user-friendly CMS, allowing you to easily add, edit, and manage your website content without technical expertise.
Setting Up Your Webflow Account
The first step is to create a free Webflow account. You can explore the platform’s functionalities and test out various features before committing to a paid plan. Here’s what you need to do:
- Visit https://webflow.com/ and click “Sign Up.”
- Enter your email address and create a strong password.
- Verify your email through the link sent to your inbox.
- Congratulations! You’re now ready to explore Webflow.
Understanding the Webflow Interface
Once you’ve logged in, familiarize yourself with the Webflow interface:
- Project Navigator: Located on the left-hand side, this panel allows you to manage your website’s pages, collections (databases for dynamic content), and global settings.
- Canvas: This is where the visual magic happens! The canvas displays your website’s layout in real-time, allowing you to drag-and-drop elements and customize their properties.
- Designer Panel: This panel on the right-hand side provides deeper control over your website’s design elements. Here you can adjust styles, animations, and fine-tune your website’s visual appeal.
- Navigator Panel: This panel provides an overview of your website’s hierarchy, allowing you to navigate between sections and pages easily.
Building Your First Webflow Website: A Step-by-Step Guide
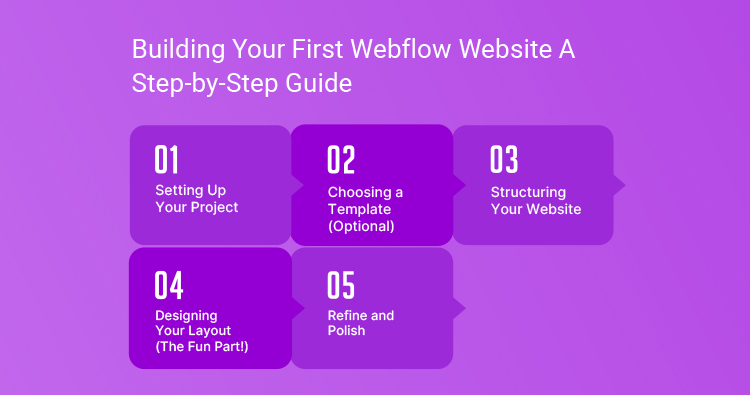
Setting Up Your Project:
- Create a Free Account: Head to https://webflow.com/ and sign up for a free account. This allows you to explore the platform’s features before committing to a paid plan.
- Start a New Project: Click the “+” symbol and select “Website.” Give your project a clear and descriptive name for easy identification later.
Choosing a Template (Optional):
- Pre-Designed Inspiration: Webflow offers a vast library of pre-made website templates. Browse through various industries and design styles to find a starting point that resonates with your vision.
- Customization is Key: Don’t be afraid to customize! Templates are a great foundation, but the real power lies in tailoring them to your unique brand identity.
Structuring Your Website:
- Project Navigator: This panel on the left serves as your website’s blueprint. Here, you’ll define the primary sections – Home, About, Services, Contact, etc. Each page represents a distinct part of your website.
Designing Your Layout (The Fun Part!):
- Welcome to the Canvas: The Canvas is your visual playground! Here’s where you’ll use Webflow’s drag-and-drop functionality to build your website layout.
- Building Blocks: Webflow offers pre-built sections (headers, footers, navigation) and individual elements (text, images, buttons) that you can drag and drop onto your pages.
- Designer Panel: This panel allows you to fine-tune the look and feel of your website. Adjust fonts, colors, spacing, and more to create a cohesive visual style that aligns with your brand.
Refine and Polish:
- Responsive Design: Ensure your website adapts seamlessly to different screen sizes (desktop, tablet, mobile) for optimal user experience across all devices. Webflow offers built-in responsive design features to make this easy.
- Navigation Matters: Make sure your website navigation is clear and intuitive. Visitors should be able to find the information they need effortlessly.
- Microinteractions: Incorporate subtle animations and hover effects to enhance user engagement and create a more interactive experience.
- Content is King: Fill your website with high-quality content that engages your target audience. This includes text, images, and videos relevant to your brand and message.
Bonus Tip: Explore Webflow University https://university.webflow.com/ – a treasure trove of resources to learn more about Webflow’s features and unleash your creative potential.
Content Management System (CMS) (Optional):
If you plan on updating your website with fresh content regularly, consider utilizing Webflow’s CMS:
- Collections: Create collections within Webflow to manage dynamic content like blog posts, testimonials, or product listings in an e-commerce store.
- Content Entry: Easily add new content items to your collections, such as writing blog posts or creating product descriptions.
- Displaying Content: Webflow’s CMS allows you to dynamically display your content on various website sections.
Conclusion

Congratulations! You’ve taken a significant step towards building your online presence with Webflow. By following this guide and exploring the platform’s functionalities, you’ll be well on your way to launching a website that not only looks stunning but also functions flawlessly.
Remember, the journey of building a website is an ongoing learning process. Webflow offers a vast learning curve, but with dedication and exploration, you can unlock its full potential. Utilize the platform’s extensive resources, experiment with different design elements, and don’t be afraid to seek out tutorials and online communities for inspiration and troubleshooting.
Webflow empowers you to create a website that reflects your unique vision and captivates your target audience.
Fineart’s Expertise
Ready to build your dream website but unsure where to start? Fineart Design Agency offers exceptional Webflow web design services. Our team can help you translate your vision into reality, saving you time and ensuring a professional outcome.
